


March 27, 2020
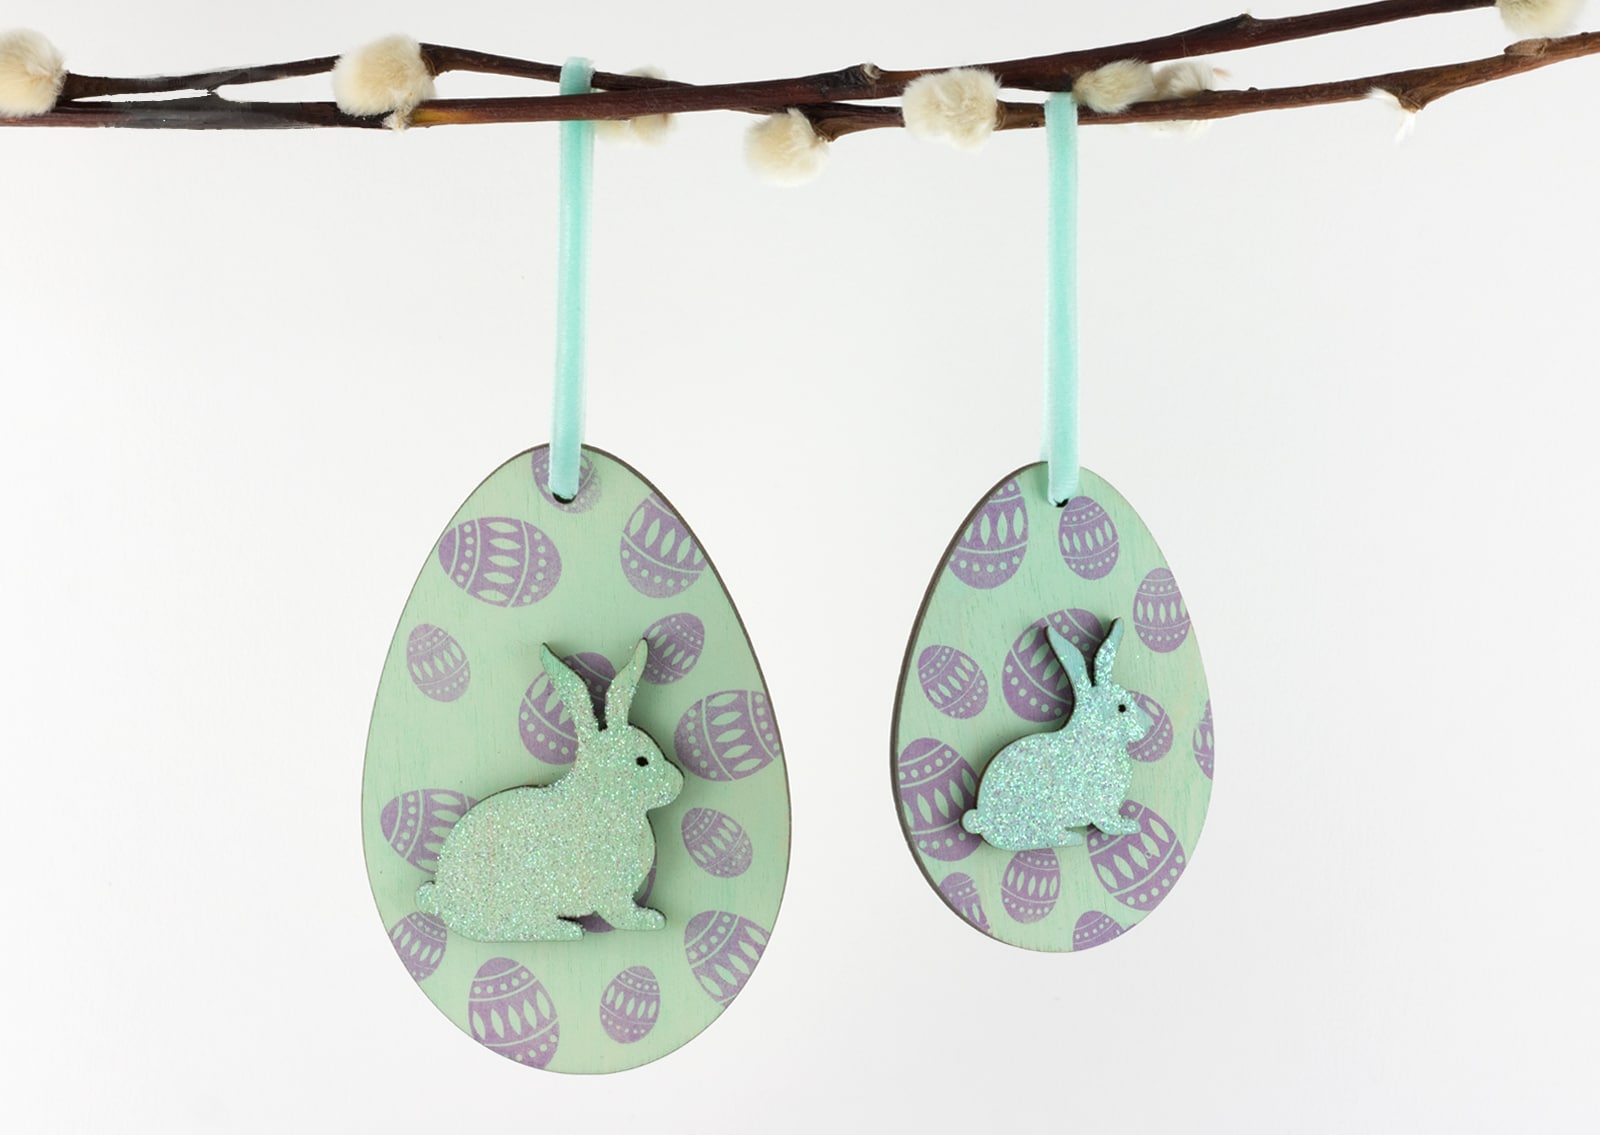
At Artcuts we love an Easter-themed craft project to brighten up your home and garden. This week, we’ve been getting creative and crafting a sweet bunny and egg decoration with a purple and mint colour-way, perfect for Spring-time. This project is a great way to practise your stamping skills and to have fun with some glitter!
You will need:
- Wooden Easter egg (8cm & 6cm)
- Wooden Easter bunny embellishment (both sizes)
- Aquatic Splash ink pad
- Purple Hydrangea ink pad
- Easter egg stamp set
- PVA craft glue
- Iridescent glitter
- Velvet ribbon – aqua
The ‘large’ bunny embellishments fit on our 8cm eggs and the ‘small’ bunny embellishments fit on our 6cm eggs.
Step 1: Apply aquatic splash to the wooden egg, using the sponge to colour the entire shape.


Step 2: Carefully dab purple hydrangea to your easter egg stamps. We recommend testing the rubber stamp on a scrap piece of paper first.
Step 3: When you’re ready, stamp directly onto the wooden egg. Twist and turn your stamp for different angles and make sure to re-apply the ink between every impression.


Step 4: Apply aquatic splash to the wooden bunny, using the sponge to colour the entire shape. Let the ink dry.

Step 5: With a damp paintbrush, apply PVA craft glue to the entire bunny.

Step 6: Sprinkle your iridescent glitter all over the bunny. Turn the bunny over and tap the back to remove any excess glitter.


Step 7: Apply PVA craft glue to the reverse side of your bunny and glue to the centre of the wooden egg.


Step 8: Thread your ribbon through the hole in the wooden egg.

Done!

We hope you enjoy making this lovely Easter decoration and don’t forget to share your creations with us on Instagram and Facebook!
Watch the full video tutorial:
