


July 16, 2020
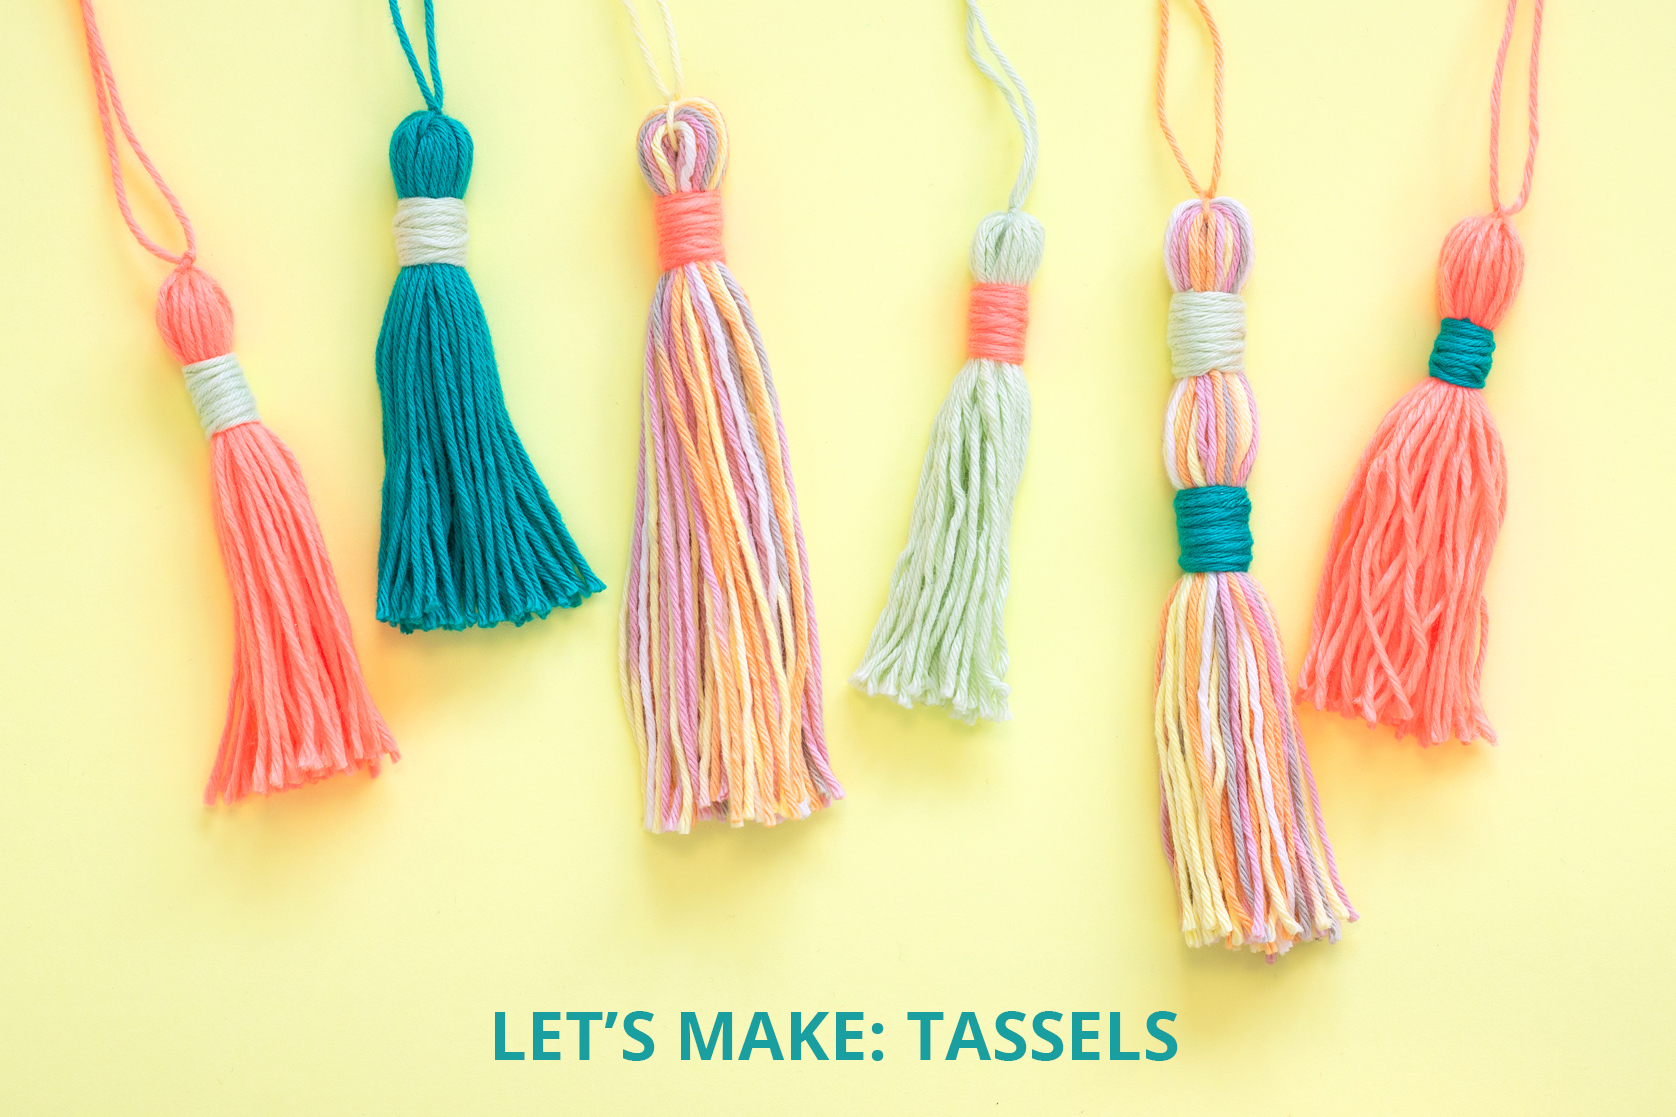
Tassels! These fun, fluffy accessories are a fabulous way to introduce vibrant colours and soft textures into your craft projects and they are also super easy to make!
If you’ve never made a tassel from scratch before, this step by step tutorial is a great place to start.
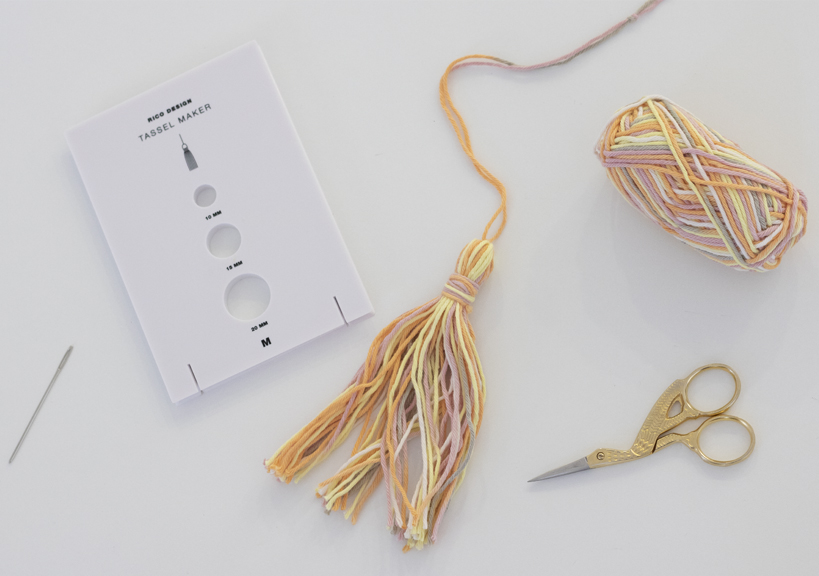
You will need:

Step-by-step instructions:

1. Start by hooking the end of your yarn into the bottom left slot then wrap the yarn up and over the top of the maker. Continue to wind the yarn vertically around the maker until you are happy with the thickness of your tassel (you can use the holes to determine the width).
2. Once you’re happy with the thickness of your tassel, hook the yarn in the bottom right slot of the maker.

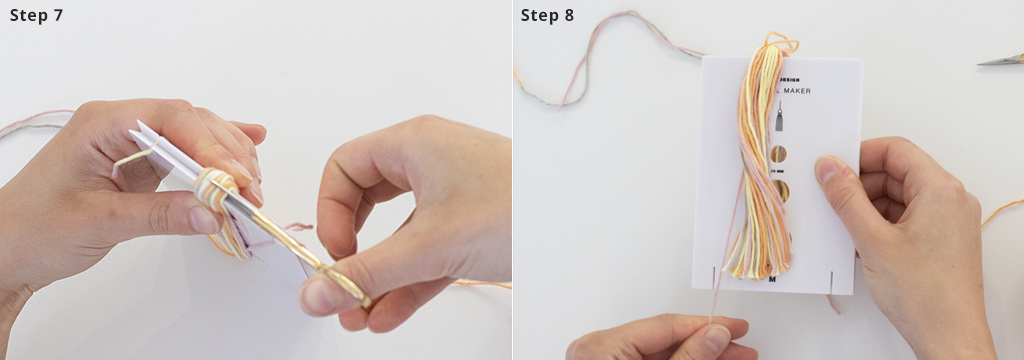
3. Trim the excess yarn leaving roughly 4cm.
4. Cut a length of yarn roughly 30cm long and thread through a needle.

5. Post the needle under the yarn bundle in the groove at the top of the tassel maker.
6. Tie the yarn securely at the top.
7. At the bottom of the maker, carefully cut the bundled yarn (the groove will help guide your scissors).
8. Release the yarn from the slots.

9. Feed the top 2.5cm-3cm of the tassel through one of the holes in the maker.
10. Securely tie a new length of approximately 50cm of yarn around the head of the tassel, keeping one end significantly longer (a double knot works well).

11. Then wrap the two ends together around the bundle until you are happy with how it looks (when the shorter end runs out, keep wrapping). Thread a needle onto remaining length.
12. Feed the needle through the wrapping and pull all the way through to finish the tassel.
13. Trim the bottom of your tassel to your desired length and voila!
Top tips: Feel free to use more than one colour yarn for the tassel or the wrapping. And for another effect, you can try adding an extra wrapping below the first one – or more!
Watch the full how to video here:
